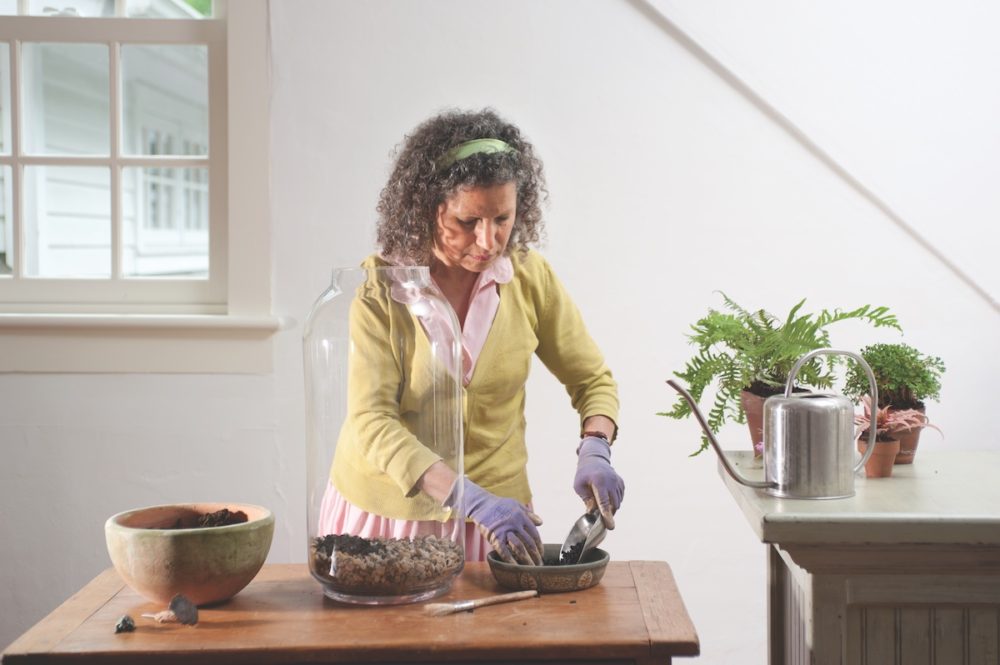
Garden writer and author Tovah Martin shows how to make a terrarium.
My inspiration for this terrarium was a nature hike. Actually, because a terrarium can tell the story of many moments outdoors, this composition wasn’t about just one walk in the woods. It speaks of many rambles in the forest, as well as strolls on the beach. Although I might be working at my computer in a space with only indirect light and scant humidity and no time to slip outside, looking into this succinct glass world transports me virtually into the woods. I feel the moss underfoot; I wade between the ferns. Glancing at the earth star, I see the surf. That’s the magic of a terrarium.
TERRARIUM SUPPLIES
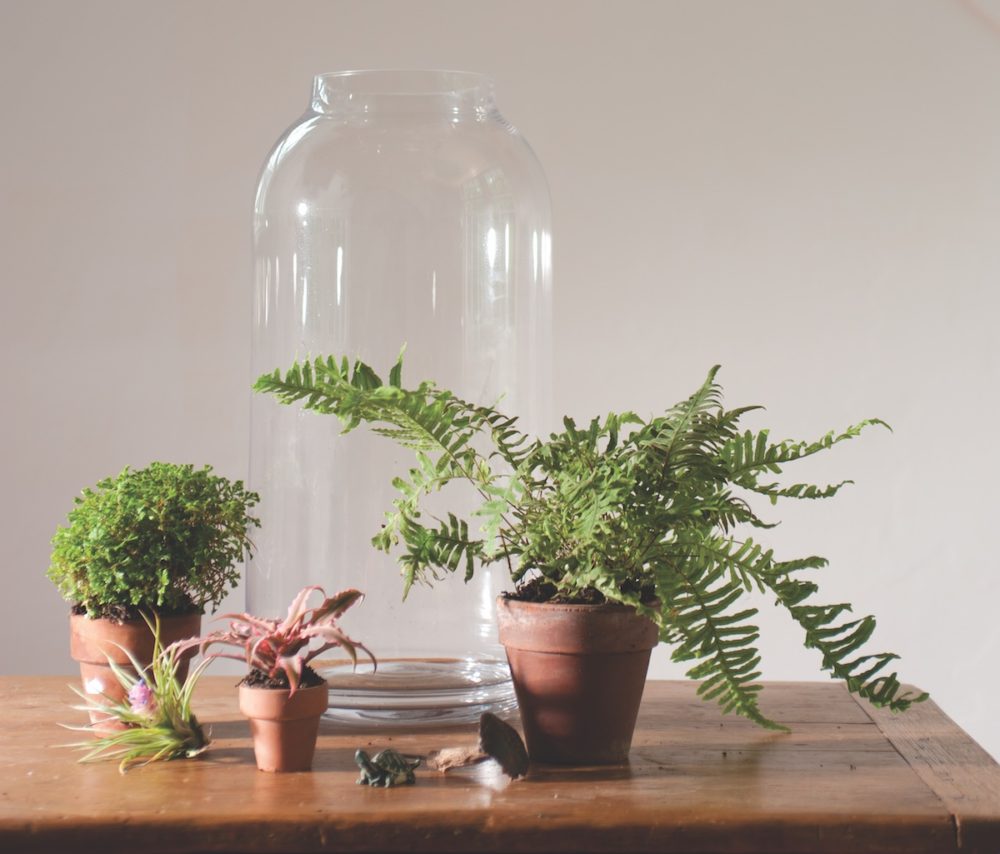
- Glass vessel, either open-topped or with a lid (pictured: Soda Shop Terrarium, $128, shopterrain.com)
- Selaginella species (club moss)
- Tillandsia stricta (air plant)
- Cryptanthus bivittatus (earth star)
- Polypodium formosanum (caterpillar fern)
- Faux turtle, faux mushroom
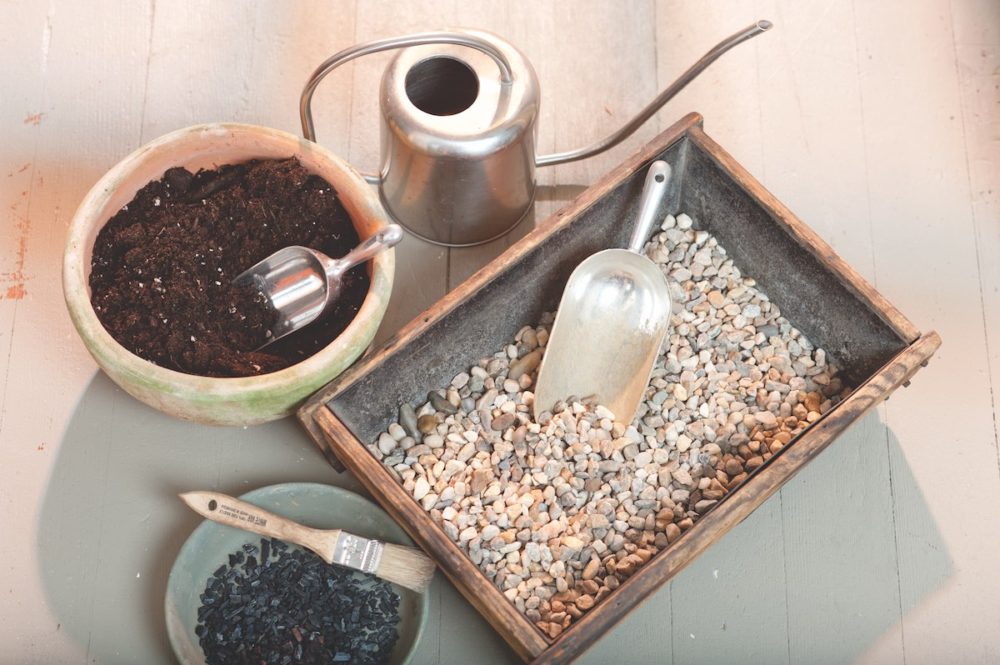
- Watering can
- ⅜-inch pebbles
- Horticultural charcoal (available at nurseries or aquarium supply stores)
- Potting soil
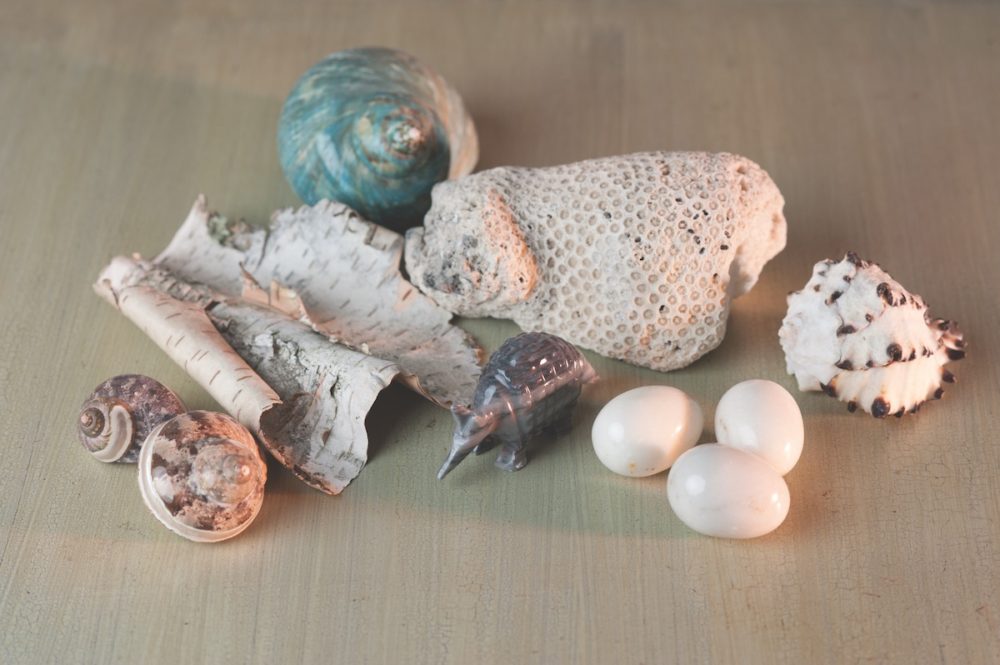
No terrarium is complete without some “found nature” tucked in, and fun stuff also adds character. Consider including some of these items in your terrarium:
- Seashells
- Birch bark
- Carved trinkets
- Fossils
- Faux eggs
HOW TO MAKE A TERRARIUM
STEP 1
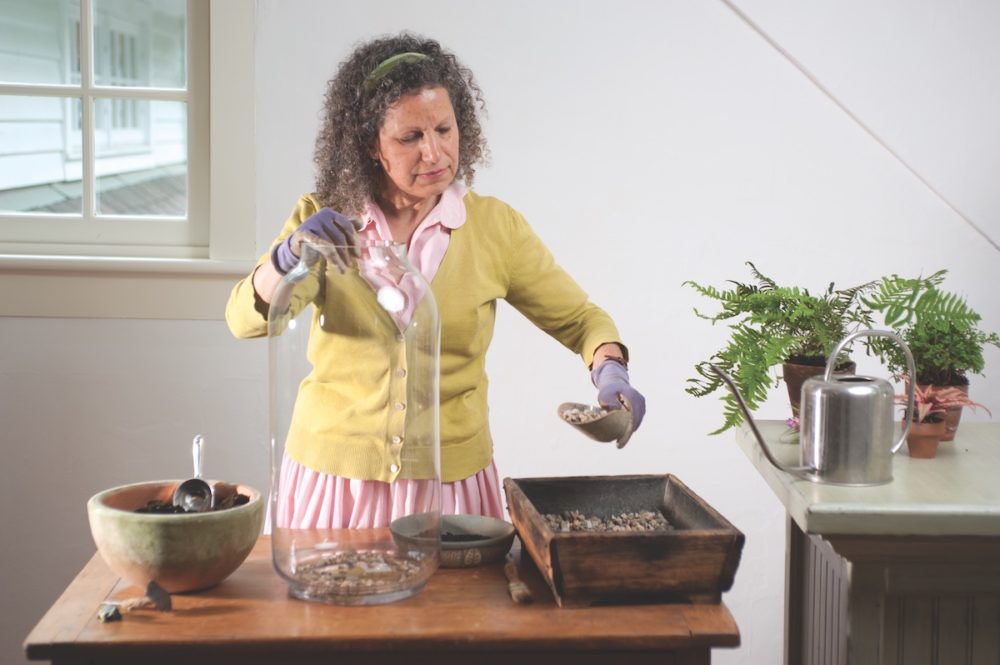
Wearing gloves, scoop the ⅜-inch pebbles into the container. For a large container, put a 1½-inch layer of pebbles on the bottom. (Smaller vessels will require less.)
STEP 2
Scoop the horticultural charcoal into the bottom of the container. Most containers take about a tablespoon, but a larger container will require more. The charcoal will keep any water that dribbles down to the bottom from going stagnant and smelling swampy.
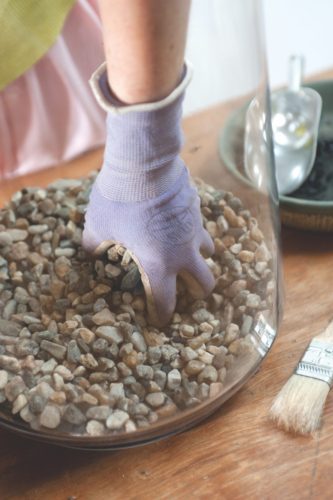
STEP 3
Thoroughly mix the pebbles with the charcoal. When you’re finished, the charcoal should be evenly distributed with the pebbles. Level the layer.
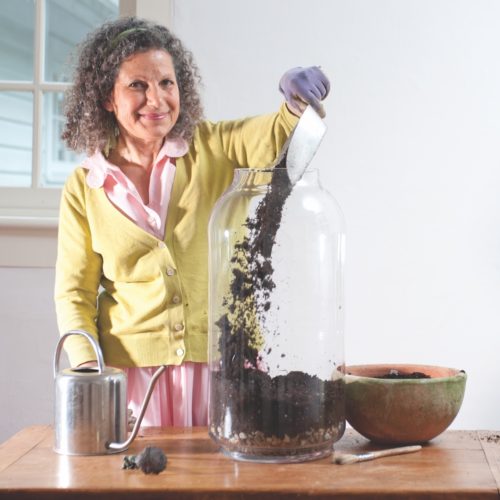
STEP 4
Pour in your soil. If you’ve selected plants that are in small containers (and I strongly recommend that approach), a 2½-inch layer of soil should do the trick. Level the soil layer and tamp it down lightly.
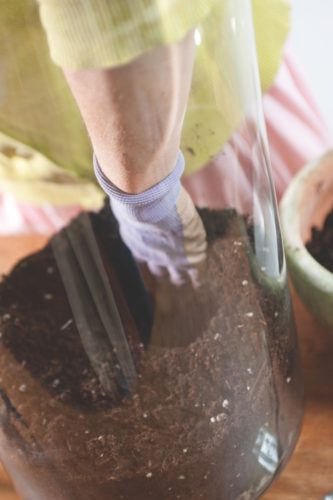
STEP 5
Dig a hole in the potting soil to receive the plant. Be sure it’s sufficiently wide and deep enough so the roots won’t be exposed.
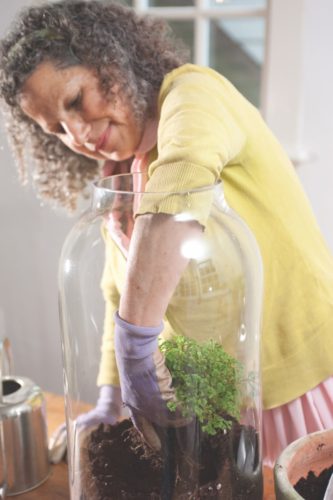
STEP 6
Tease out some roots from the root ball, and insert the plant into the hole. (I’m working with the club moss, in this case.) I start with my horizontal plants first so I won’t be navigating around taller plants in a confined space as I add plants. Be sure to firm each plant into its hole before proceeding with the next element.
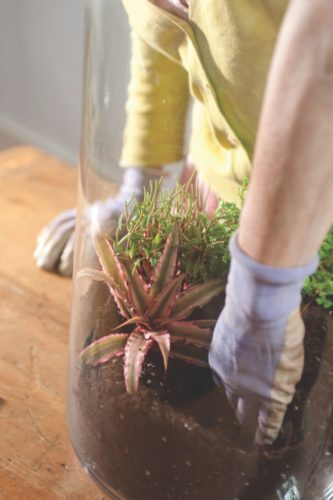
STEP 7
Continue to work around the terrarium, digging holes, inserting plants, and firming each plant into its position. Keep in mind, for a terrarium that’s meant to look great instantly, tuck your plants close together—they can always be groomed later as they grow.
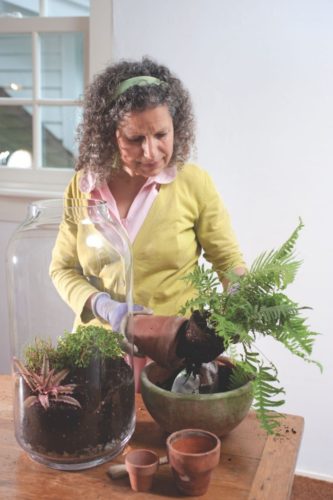
STEP 8
Unpot the final vertical element to give the container height. (Ferns work beautifully for this job.) Tease the roots free if the plant has a tightly wound root ball.
STEP 9
Air plants make a wonderful little accent in a terrarium. Because they thrive with absolutely no soil (the humidity in the terrarium will keep them happy), they don’t need to take up a “parking space.” Just wedge them where you need a pop of color.
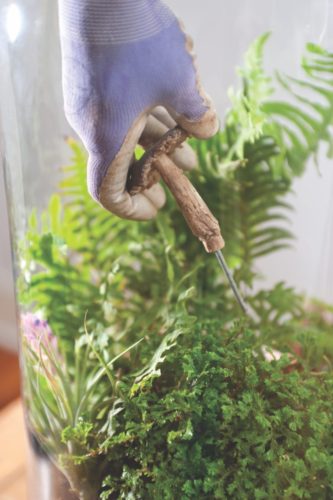
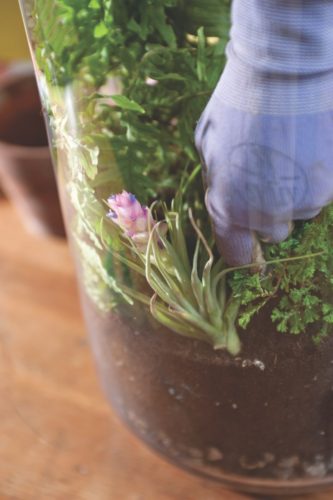
STEP 10
Then insert your bling. Anything from nature works—I love to use faux mushrooms (and yes—real mushrooms have occasionally sprouted and done no harm, much to my delight). This one looks exactly like the genuine article and has a “leg” to insert it and keep it stable.
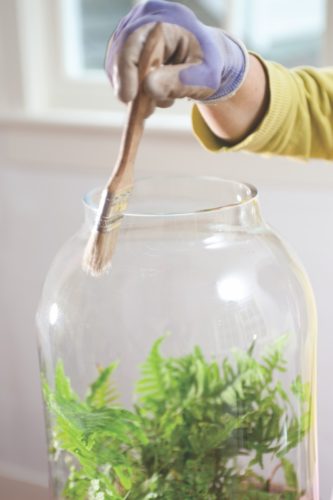
STEP 11
Give the glass a clean sweep with a paint-brush—cleaning off any soil that’s marring the view. Throughout the terrarium’s lifespan, occasionally wipe off the glass to keep it tidy.
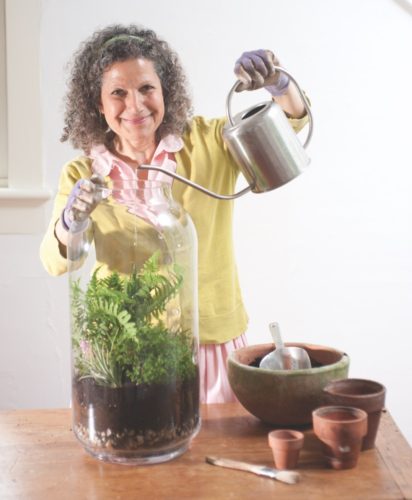
STEP 12
Just add water. But only give the terrarium a light watering to slightly dampen the soil. Even a large terrarium such as this one will need less than a cup of water. If your terrarium is open, water it once every 10 days or so (depending on the weather). Finally, if it’s a closed terrarium, air it out for a few hours every two to three weeks, and then water it if there is no condensation on the glass when you cover it up again.
By Tovah Martin, tovahmartin.com | Photography by Kindra Clineff

The New Terrarium: Creating Beautiful Displays for Plants and Nature (Clarkson Potter, 2009)
Featured book: The New Terrarium: Creating Beautiful Displays for Plants and Nature by Tova Martin (Clarkson Potter, 2009)
Get Martin’s six tips for terrarium care and enjoyment.