[vc_row][vc_column][vc_row_inner][vc_column_inner width=”1/2″][vc_single_image image=”200435″ img_size=”full”][vc_column_text css=”.vc_custom_1625068329708{margin-top: -15px !important;border-top-width: -15px !important;padding-top: -15px !important;}”]
[/vc_column_text][/vc_column_inner][vc_column_inner width=”1/2″][vc_column_text]Branches are the architecture of any arrangement, providing structure, height, grace, and balance. You can use branches on their own when you want to make a big impression in a large space—a church nave, for example, or a high-ceilinged room. Their impact can be so dramatic that the space requires nothing more.[/vc_column_text][vc_empty_space height=”16px”][vc_column_text]
Seasonal Options
Arboreal possibilities are limitless, depending on the season. Throughout the year, the copper beech, with its deep burgundy leaves, is particularly grand, while the delicate weeping willow provides curves and wisp. For fall, search out branches of winged euonymus, which turns red in autumn, or forsythia, whose leaves turn a dark maroon. Viburnum leaves become purple and often have upright berries. In the winter, delight in the stark beauty of white pine. Flowering trees and shrubs offer their own springtime rewards: crabapple or plum blossoms, decorative quince, dogwood, lilac, and magnolia. In the summer, seek out apricots, peaches, and other fruited branches.[/vc_column_text][/vc_column_inner][/vc_row_inner][vc_column_text]
Preparing Branches
[/vc_column_text][vc_single_image image=”200434″ img_size=”full”][vc_column_text]Preparation is crucial when adding branches to any arrangement. You must cut or smash the woody stems so they will take in sufficient water. Whenever possible, I recommend using a double cut, in the form of an X, at the base of each stem, since smashing will often cause the branches to cloud the water in a glass vase. If a branch is thin, a single cut will suffice.
Choose some branches for their leaves—like the dependable copper beech—and some for their architecture. Be sure to strip the latter of foliage so the wood is revealed. For some branches, you can pull away the leaves to reveal seedpods, as with ash or linden; for other arrangements, you want only branches with blossoms.
Branches are often the starting point for an arrangement, their woody stems creating a superstructure upon which to build. If your vase is tall enough, a floral frog won’t be necessary, but it’s always a good idea to make sure that large urns are heavy enough so your arrangement won’t take a tumble.[/vc_column_text][vc_row_inner][vc_column_inner][vc_empty_space height=”8px”][vc_column_text]
[/vc_column_text][vc_empty_space height=”8px”][vc_column_text]

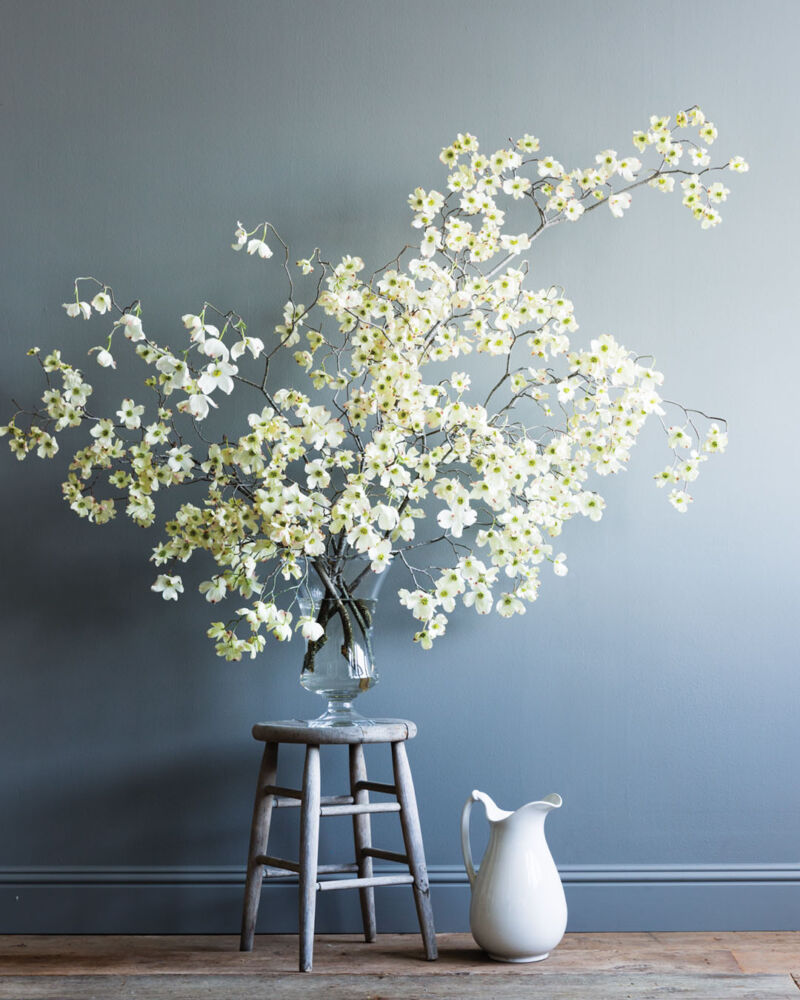
An arrangement of flowering dogwood branches
[/vc_column_text][/vc_column_inner][/vc_row_inner][vc_column_text]
How to Edit a Branch Arrangement
The beauty of a branch lies in its architecture, and revealing this architecture often requires editing. Select branches that arch in a variety of directions. These will form your base layer. It’s easier to work with branches that already lean in one direction or another.
Step 1
Using pruning shears or scissors, trim the leaves on each bough to expose the structure of the branch. If using a fruited bough, for example, the goal is to reveal the fruit. Therefore, you should trim off any leaves that get in the way. Sometimes, you want to show only the fruit, especially with a particularly exotic, gnarly branch. Other times, you want to keep some leaves if they add to the overall look of the arrangement. If using a branch for its colorful leaves, simply thin the leaves so the best ones stand out. If your goal is to reveal only seedpods, then all leaves must go.
Step 2
Trim off any dead or discolored twigs, foliage, or fruit.

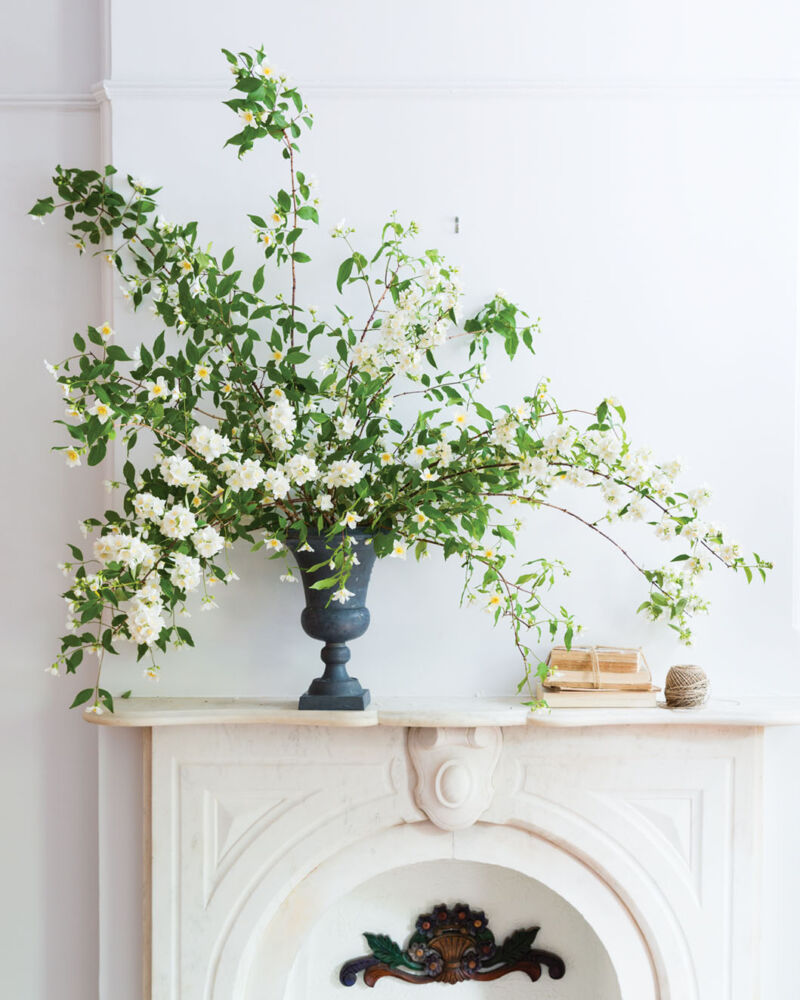
Billowing branches of mock orange, also known as English dogwood, spill over a cast-iron urn
Step 3
Trim the bottom of the branches, and cut an X in the bottom of each stem so it can better absorb water. Remove all leaves that will fall below the waterline.
Step 4
Anchor the branches with a floral frog, if necessary. You do not need an anchor if the vase is deep or its opening is narrow. Stand back and look at the branches in the vase. The leaves should not overlap or crowd the vase and should not sit below the water level. You may want to edit further. The beauty of a branch lies in its architecture, and revealing this architecture often requires editing. Select branches that arch in a variety of directions. These will form your base layer. It’s easier to work with branches that already lean in one direction or another.
[/vc_column_text][vc_separator border_width=”3″][vc_row_inner][vc_column_inner width=”1/2″][vc_single_image image=”200433″ img_size=”full” onclick=”custom_link” img_link_target=”_blank” link=”https://www.amazon.com/gp/product/1607747650/ref=as_li_tl?ie=UTF8&camp=1789&creative=9325&creativeASIN=1607747650&linkCode=as2&tag=flow0a7-20&linkId=4f7084a52f72e127995c9aa2e88573f8″][/vc_column_inner][vc_column_inner width=”1/2″][vc_column_text]Excerpt and photos republished from The Flower Workshop: Lessons in Arranging Blooms, Branches, Fruits, and Foraged Materials. Copyright © 2016 by Ariella Chezar. Photography copyright © 2016 by Erin Kunkel. Published by Ten Speed Press, an imprint of the Crown Publishing Group, a division of Penguin Random House LLC.
About Ariella Chezar
Ariella Chezar has been crafting swoon-worthy events and arrangements for 20 years. Known for her love of loose, nature-inspired designs, this New York–based floral designer also holds workshops in locales from Amsterdam to Maui, where professionals and amateurs alike flock to soak in her tricks of the trade. Armchair arrangers can, too, in her book, The Flower Workshop (Ten Speed Press, March 2016). Read Next: “Mastering Flowers, Ariella Style”[/vc_column_text][/vc_column_inner][/vc_row_inner][/vc_column][/vc_row]


